本Howtoでは、remote.it(リモートイット)を使用し、作業用PCからArmadillo-IoT G3LにSSHで接続する方法をご紹介します。
remote.itとは
remote.itとは、デバイスとP2P接続やクラウド接続が実現可能なサービスです。
詳しくはhttps://remote.it/jpをご参照ください。
事前準備
remote.itのアカウント登録
remote.itのアカウント登録を行います。remote.itのアカウント登録については、サインアップを参照して下さい。
remote.itのアカウント登録完了後、remote.itにサインインすると、「デバイス管理ポータル」と呼ばれる管理画面が表示されます。
このデバイス管理ポータルで、各デバイスのステータスや接続状態などを管理する事ができます。
Armadillo-IoT ゲートウェイ G3Lのネットワーク設定
今回は例として、Armadillo-IoT G3LのネットワークにLTEを用います。
Armadillo-IoT ゲートウェイ G3L 製品マニュアルを参考にLTEのネットワーク設定を行います。
ssh サーバーのインストール
ネットワークの設定が完了したら、以下のコマンドを実行します。
atmark@armadillo:~$ sudo apt update
atmark@armadillo:~$ sudo apt install -y openssh-server
remote.itにデバイス(Armadillo-IoT G3L)を登録
remote.itにデバイス(Armadillo-IoT G3L)を登録するために、以下の手順を実行します。
connectdのインストール
以下のコマンドを実行します。
atmark@armadillo:~$ cd /tmp
atmark@armadillo:/tmp$ wget https://github.com/remoteit/installer/raw/master/scripts/auto-install.sh
atmark@armadillo:/tmp$ chmod +x auto-install.sh
atmark@armadillo:/tmp$ ./auto-install.sh
Armadillo-IoT G3Lをremote.itのデバイスとして登録
Armadillo-IoT G3Lをremote.itデバイスとして登録するために、"connectd_installer"を実行します。
atmark@armadillo:/tmp$ sudo connectd_installer
"Sign In Menu"が表示されます。この画面でremote.itのアカウントの設定などを行うことができます。
********************* Sign In Menu *********************

     1) Sign in to your existing remote.it account
     2) Request a code for a new remote.it account
     3) Enter a verification code received in e-mail
     4) Exit

********************************************************

Choose a menu selection (1 - 4):
1
今回は、事前にremote.itのアカウント登録を済ませているため、'1'を入力して、Enterを押下します。
Please enter your remote.it Username (e-mail address):
[メールアドレスを入力する]
remote.itにアカウント登録した際のメールアドレスを入力して、Enterを押下します。
Please enter your remote.it password:
[パスワードを入力する]
remote.itにアカウント登録した際のパスワードを入力して、Enterを押下します。
Enter a name for your device (e.g. my_Pi_001).

The Device Name identifies your device in the remote.it portal.
Your services will be grouped under the Device Name.

Only letters, numbers, underscore, space and dash are allowed.

Armadillo-IoT_G3L
登録するデバイス名(※1)を入力します。
今回は例として、"Armadillo-IoT_G3L"というデバイス名を登録します。入力完了後は、Enterを押下します。
(※1)デバイス名について
- デバイス名は、remote.itのデバイス管理ポータルで、デバイスを識別するための物です。
- デバイス名には、文字、数字、アンダースコア、スペース、ダッシュのみ使用できます。
デバイス登録に成功すると、remote.itアカウントのメールアドレス宛に通知メールが送信されます。
============================ Main Menu ============================

    1) Attach/reinstall a remote.it Service to an application
    2) Attach/reinstall a remote.it Service to a LAN application
    3) Remove a remote.it Service from an application
    4) Remove all remote.it Services, then exit
    5) Exit

===================================================================
    'application' is any TCP service (e.g. SSH, VNC, HTTP, etc.)
    running on this device.  'LAN application' is a TCP service
    running on another device on this LAN.
===================================================================
Choose a menu selection (1 - 5):
1
"Main Menu"が表示されます。この画面で、使用するアプリケーション(SSH、VNC、HTTPなど)を指定することができます。
'1'を入力して、Enterを押下します。
*********** Protocol Selection Menu ***********

     1) SSH on port 22
     2) Web (HTTP) on port 80
     3) Secure Web (HTTPS) on port 443
     4) VNC on port 5900
     5) nxWitness on port 7001
     6) Samba (SMB) on port 445
     7) Remote Desktop (RDP) on port 3389
     8) NextCloud on port 443
     9) OpenVPN on port 1194
     10) Custom (TCP)
     11) Return to previous menu

***********************************************

 You can change the port value during install

***********************************************

Choose a menu selection (1 - 11):
1
"Protocol Selection Menu"が表示されます。今回はSSHを用いるため、'1'を入力して、Enterを押下します。
The default port for SSH is 22.

Would you like to continue with the default port assignment? [y/n]
y
SSHのポート番号を設定します。defaultの22番ポートを利用する場合は"y"を、他のポート番号を利用する場合は"n"を選択し、Enterを押下します。
(この手順では、デフォルトの22番ポートで動作検証を行います。)
Enter a name for this remote.it service (e.g. ssh-Pi).
This name will be shown in your remote.it Service List.

Only letters, numbers, underscore, space and dash are allowed.

Armadillo-IoT_G3L_ssh
登録するサービス名(※2)の入力を入力します。
今回は例として、"Armadillo-IoT_G3L_ssh"というサービス名を登録します。入力完了後は、Enterを押下します。
(※2)サービス名について
- サービス名は、remote.itのデバイス管理ポータルで、サービスを識別するための物です。
- サービス名は、デバイス名の下にグループ化され、サービス一覧に表示されます。
- サービス名には、文字、数字、アンダースコア、スペース、ダッシュのみ使用できます。
全ての設定が完了したため、ツールを終了します。
============================ Main Menu ============================

    1) Attach/reinstall a remote.it Service to an application
    2) Attach/reinstall a remote.it Service to a LAN application
    3) Remove a remote.it Service from an application
    4) Remove all remote.it Services, then exit
    5) Exit

===================================================================
    'application' is any TCP service (e.g. SSH, VNC, HTTP, etc.)
    running on this device.  'LAN application' is a TCP service
    running on another device on this LAN.
===================================================================
Choose a menu selection (1 - 5):
5
再び"Main Menu"が表示されます。'5'を入力して、Enterを押下します。
Are you sure you want to exit? [y/n]
y
設定終了の最終確認が表示されるので、"y"を入力して、Enterを押下します。
作業用PCからremote.itのデバイス管理ポータルを表示
作業用PCのwebブラウザから、remote.itのデバイス管理ポータルを表示します。
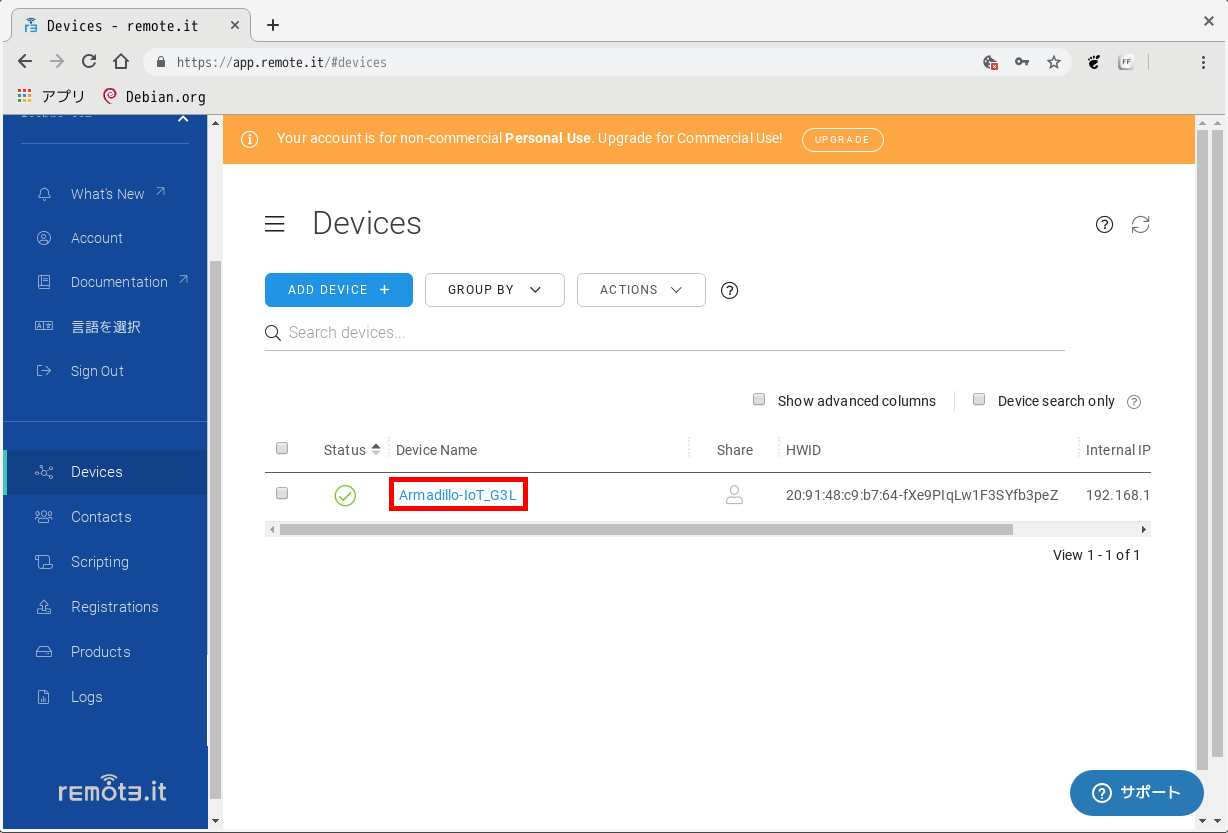
"Devices"画面に、先程登録したArmadillo-IoT G3Lのデバイス名"Armadillo-IoT_G3L"が追加されていることを確認します。
デバイス名"Armadillo-IoT_G3L"をクリックすると、"Device Services"ウィンドウが表示されます。
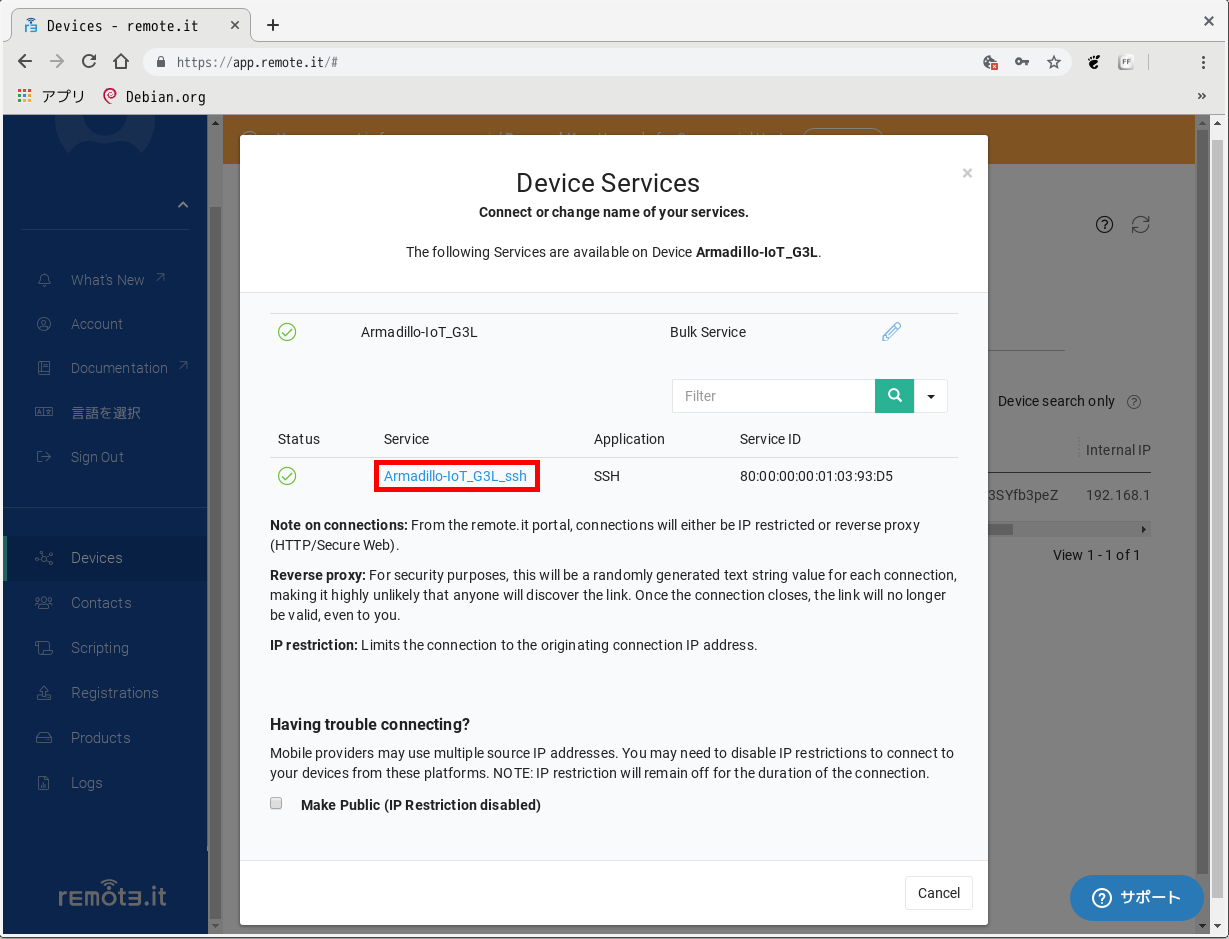
登録されているサービスの一覧の中に、先程登録したArmadillo-IoT G3Lのサービス名"Armadillo-IoT_G3L_ssh"が追加されていることを確認します。
サービス名"Armadillo-IoT_G3L_ssh"をクリックすると、"SSH Connection"ウィンドウが表示されます。
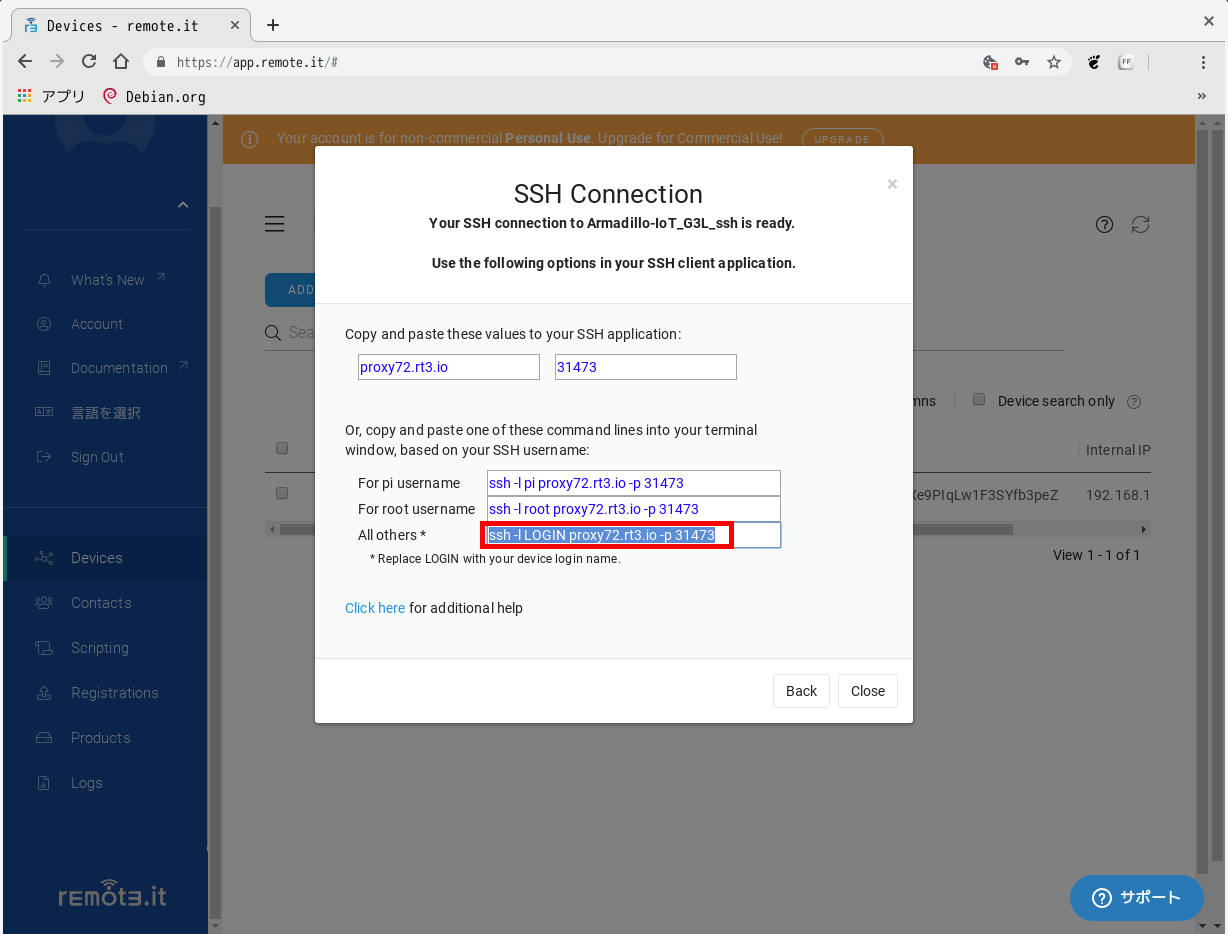
ウィンドウ内にホスト名とポート番号が表示されます。
今回は、ウィンドウ内に表示された、"ALL Others *"の項目をコピーして、作業用PCからSSHコマンドでArmadillo-IoT G3Lへ接続します。
作業用PCからSSHコマンドを実行
先程コピーしたコマンドを作業用PCのTerminalに貼り付けて実行します。実行する際、"LOGIN"オプションは任意のログイン名に変更して下さい。
今回は"atmark"ユーザーでログインするため、以下のコマンドを実行します。
~$ ssh -l atmark proxy71.rt3.io -p 31473
SSHコマンドの初回接続時は、以下のメッセージが表示されます。
Are you sure you want to continue connecting (yes/no)? yes
"yes"と入力して、Enterを押下します。
atmark@proxy71.rt3.io's password: [パスワードを入力する]
パスワードが要求されますので、atmark ユーザーのパスワードを入力して、Enterを押下します。
atmark@armadillo:~$
これで、作業用PCからArmadillo-IoT G3Lに接続することができました。